

BENEFITS OF USING BREATH (PRANAYAMA) EXERCISES FOR YOUR PELVIC FLOOR:
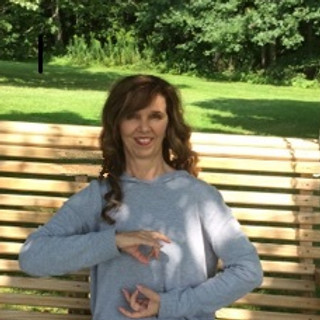
Breathing does much more than simply bring air (oxygen) into the lungs. Earlier blog articles have addressed the many ways reducing stress benefits the body by reducing Sympathetic Nervous System (SNS) activation. Learning to manage your breath through breathing exercises (as described below) is a quick “hack” for tapping into the Parasympathetic Nervous System (PNS). Yet few are aware of some additional ways breath practice (Pranayama) helps other systems of the body, particularly the pelvic floor.

Optimal, effective breathing benefits the pelvic floor as it:
· Encourages the proper relationship between the pelvic floor and the diaphragm
· Reduces levels of stress, anxiety, and depression, which can reduce tension in the pelvic floor
· Improves your mind-body connection (self-awareness), which means you become aware of habits/patterns (sitting, standing, walking, toileting, etc.) that impact the pelvic floor
· Lowers inflammatory cortisol levels, which can lead to discomfort and (dis)ease
· Increases delivery of oxygen & nutrients, and removal of waste products from the body
· Encourages non-habit-forming pain management.
FOLLOWING ARE SOME BREATHING PRACTICES THAT WILL ENCOURAGE A HEALTHIER PELVIC FLOOR.
1. BREATHE THROUGH YOUR NOSE.
Inhaling through the nose prepares the air you are breathing by moisturizing it, filtering particles and allergens, and warming the air before it reaches your lungs.
2. ADJUST YOUR POSTURE.
Breathing is usually easier to assess while lying on your back, so lie back, supporting your neck with only a thin pillow or blanket, and use a bolster, blanket or a pillow beneath your knees to get comfortable. Practice in a relaxing space and be sure you are comfortable and supported.
If you choose to move to seated or standing practice, be sure to use good posture. More to come about that later, but try to stack your head over your shoulders, shoulders over your hips. Avoid slumping, head jutting forward, or tension in the neck and shoulders, and keep your knees soft while standing. Good posture facilitates proper breathing dynamics and aligns the many "diaphragms" of the body, which ensures that the pelvic floor, diaphragm, and "piston" action of breathing are optimized.

3. BREATHE INTO YOUR RIBS/DIAPHRAGM with 3-D BREATHING.
Lie down comfortably and place one hand on your ribs and one on your upper chest. Where do you feel the expansion and movement most as you breathe in? Is your top hand the only hand moving? Next, place one hand on your ribs and one on your low belly. Where do you most feel the expansion and movement now as you breathe in? Is your bottom hand moving the most? Can you feel movement in your ribs? If you now place each hand on each side of your ribs and try to direct the movement into the ribs, where do you feel it? Can you feel the ribs moving upward? Laterally (to each side)? Do the back ribs descend toward the floor?
Once you get an idea of how you customarily breathe, we will try to move toward the Diaphragmatic breath. We are aiming to get more breath moving into the ribs and diaphragm in order to get the diaphragm and pelvic floor to work together as a pressure system. It is that pressure system that helps to maintain stabilization of the spine, which helps to prevent injury and pain, and encourages proper pelvic floor muscle action. Try to direct the inhalation into the ribs, and use a longer, slower exhalation (through the nose or the mouth), without forcing. Allow the breath to move out slowly on the exhalation and look out for forcing, bracing, etc. You can continue to use your hands on the various points for feedback and to remind you to move the breath into the areas of the ribs/diaphragm. Discontinue the practice if it makes you feel "air hunger", as you may be moving too quickly. Change can take a little time and practice. Sooooo...
4. PRACTICE IN SHORT INTERVALS, 5-10 MINUTES, 2X A DAY.
You shouldn't force the breath, nor practice until you feel uncomfortable or over-taxed. Short, small practices several times a day are much more effective in creating a healthy breathing habit and for keeping your pelvic floor comfortable. Too much too soon can sometimes cause anxiety if you are trying too hard to lengthen your breath, and a tight pelvic floor might need additional time to relax.
Throughout your day, notice when you hold tension in your body, and use your 3-D breath to relieve anxiety and stress. Remember to take the time to notice how your body feels afterward. After all, you can't change what you aren't aware of!
#yogatherapy #pelvicfloorhealth #pranayama #yoga #yogatherapist #incontinence #pelvicfloorprolapse #diastasisrectii #pelvicpain #breathing

Comments